Rice is an essential starch. It can be an integral part of the main dish like sushi rice, a side, or even a dessert. While many professional restaurants use rice cookers, there’s an art to cooking rice on the stove. And once you’ve perfected it, you’ll marvel at all of the burnt, mushy, or partially cooked batches of rice you made before. Follow along to learn how to make the stovetop rice, plus Celene Carrara from Los Angeles’ Bungkus Bagus adds some of her favorite tips as well.
Before You Start, Select Your Grain
There are many different types and grain lengths of rice. The most common colors are white, brown, and black (also called forbidden rice), and those typically fall into long or short grain varieties. Both long grain white rice like basmati and short grain sushi rice take as little as 15 minutes to cook. Black rice takes 30-40 minutes, while brown rice takes the longest, sometimes up to an hour. This method of cooking rice will work for all varieties. When in doubt about cooking times, check the instructions of whichever type you’ve purchased.
1. Choose the Right Pan
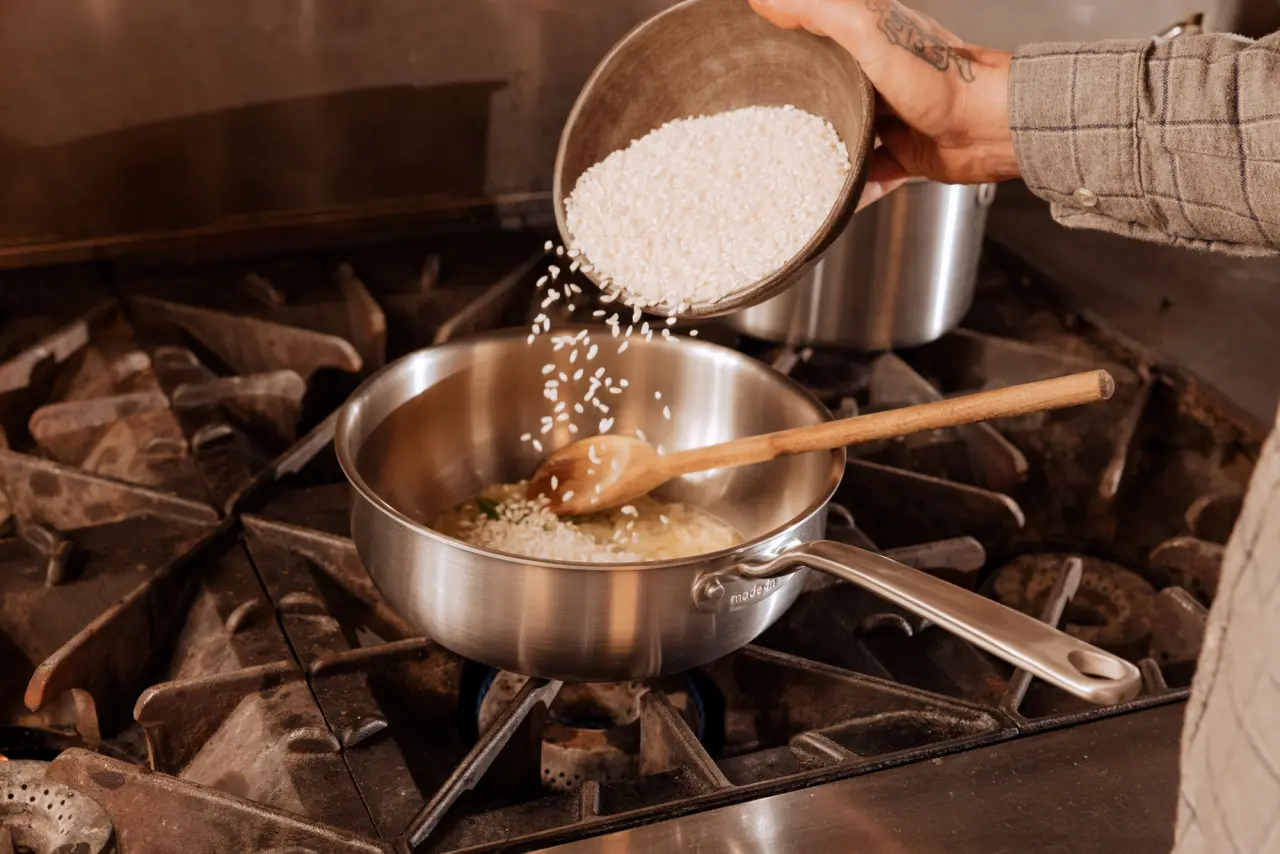
The very first step is to decide what you’re cooking your rice in. If you’re making risotto—a different process that requires a lot of stirring—our Saucier is the best choice, but since you want your rice to sit undisturbed while it cooks, we like our Saucepan.
On the other hand, like Celene Carrara, who makes rice almost every day, you might prefer our Non Stick Saucepan. “When I’m cooking at home, I always use non stick,” she says. “It has the same Stainless Clad construction and I love how easy it is to clean.” Whichever Saucepan you choose, make sure you have enough room to accommodate your rice and water without the pan bubbling over.
2. Wash Your Rice
Before you begin cooking, many chefs like to rinse their rice. “It removes any impurities and dust,” says Carrara. “And it’s also part of a long tradition. Every family has their own way of doing it based on how many minutes or how many rotations you should do with your hand.”
Another reason to rinse your rice is to remove excess starch, which can cause your rice to clump together. Even rice that’s supposed to be sticky like sushi rice benefits from this process. Either pour your rice into a mesh strainer or place in a large bowl and rise until the water coming off of the grains runs clear. Make sure to do this gently so your rice doesn't get too mushy. Now you’re ready to cook.
3. Bring to a Boil
Now that you’ve rinsed your rice, it’s time to begin the cooking process. Add your rinsed rice to the pot along with your desired ratio of water. The standard ratio is 1 part rice to 1 part water, with an additional ¼ to ½ cup added for evaporation. If you want slightly firmer rice, only add ¼ cup. If you scale up the rice however, the additional water remains the same, so 2 cups rice would need 2 ¼-2 ½ cups water. Keep in mind that 1 cup of dry rice will yield about 3 cups cooked. Bring the water to a boil over medium-high.
4. Reduce the Heat
Once the water is boiling, add in a big pinch of salt. Salting the water after it’s already boiling ensures that your pan won’t pit. Stir to combine and reduce the heat to low, to ensure the mixture doesn’t boil over. Place a tight fitting lid on top and let the rice cook undisturbed.
The amount of time will vary depending on your type of rice—15-20 minutes for white, 30-40 for black, 45-60 for brown. Keep the lid on your Saucepan and resist the urge to peek. This ensures that all the moisture stays inside.
5. Rest, Fluff, and Serve
When all the water has been absorbed and the rice grains are tender, remove it from heat. Let the rice rest for 10-15 minutes with the lid still on. If it’s part of a larger meal, take this time to put the finishing touches on your other dishes. When you’re ready to serve, remove the lid and gently fluff the rice with a fork. You should be greeted with a pan of perfectly cooked rice.
Ready to Try it For Yourself?
Now that you’ve learned how to make rice in as little as 15 minutes (depending on the variety) it’s time to try this technique out for yourself on sushi rice. And, if you make too much and have leftovers, you’re one step closer to making a takeout classic at home.
